Disclosure: Affiliate links appear in this post. Any purchases made using these links will earn Taz + Belly a small commission. You can read more about our affiliate relationships here.
Sorry that this post is so late to arrive on the blog — we don’t have Wi-Fi at the campgrounds (yet!) and our hotspot ran out of data about three links shy of having this post finished on Thursday. We’re home from the beach, but still living vicariously through photos, so we’ll head back into the camper for a few more posts!
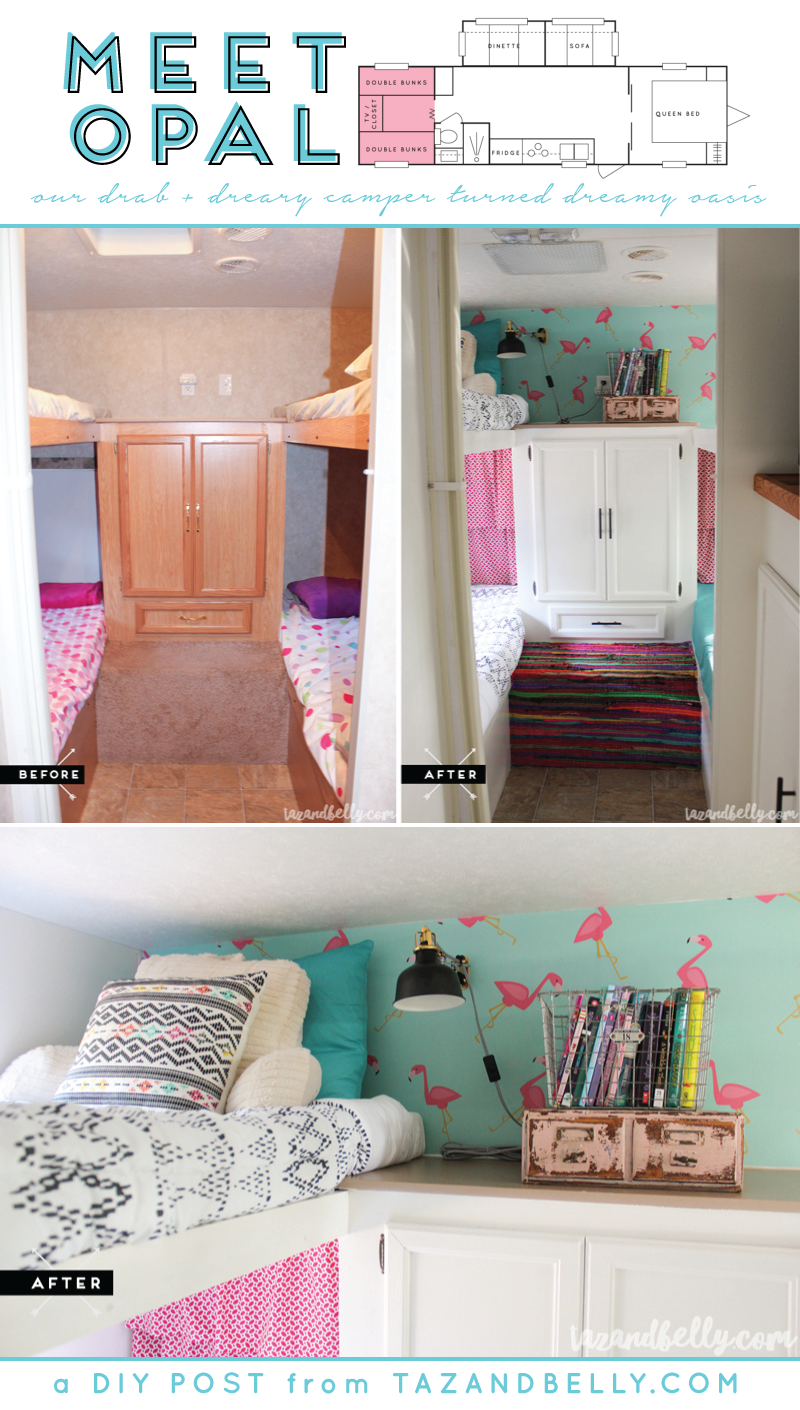
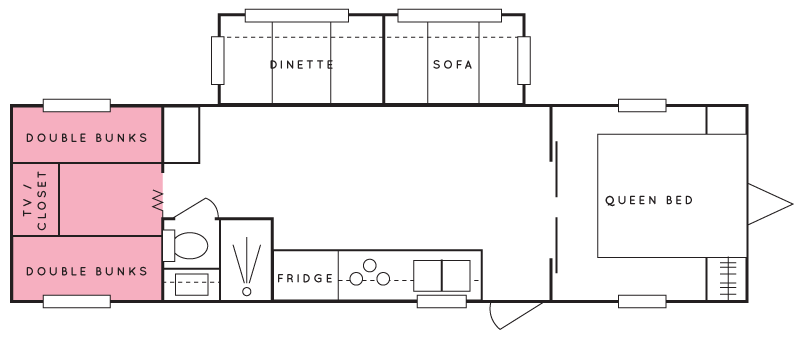
I hope you guys are loving the camper transformation posts, because today is the last day! We’re talking all about the girls’ bunkroom and how we made it a happy, colorful space. To help familiarize you with each space as we talk about it, I’m including an image of our floor plan in each post. The pink area below is the bunkroom, at the very end of our camper, to the left.
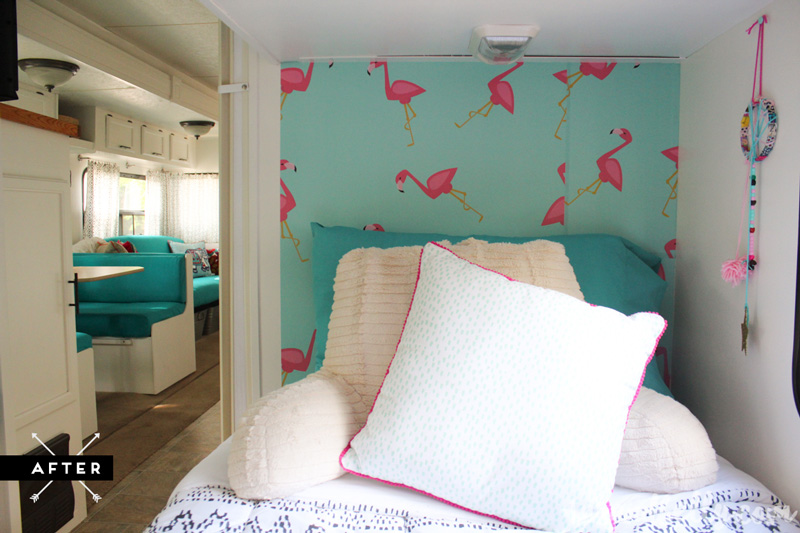
After I found the darling wallpaper for our “master” bedroom, I knew I wanted to do something equally bright and cheerful at the other end of the camper. Since all of the rooms are open to one another, and I had plans to paint the main living spaces white, I knew that having a bright colored paper at either end would help to living up the main space as well. Thank goodness, I was right!
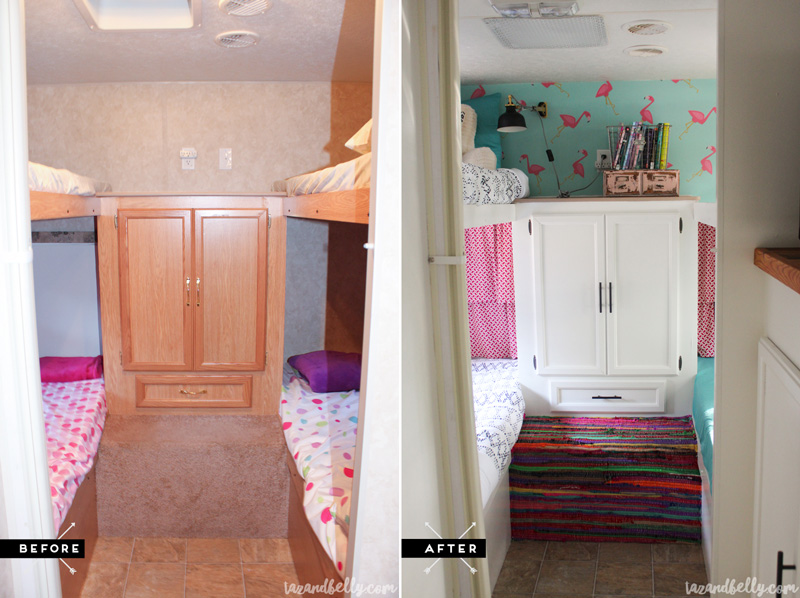
It is so hard to believe how orange everything was before. It’s like I’ve completely wiped that from my memory. I know that everything had a wood finish, but I’ve convinced myself it was light and much prettier. In this before and after photo, you can see just how orange it really was. Between the woodwork, the dingy carpet and the tiled floor, everything was a similar shade and it made the bunkhouse feel so closed it. We the added benefit of white woodwork and fun colors, even the floors fall away and become a much greyer neutral.
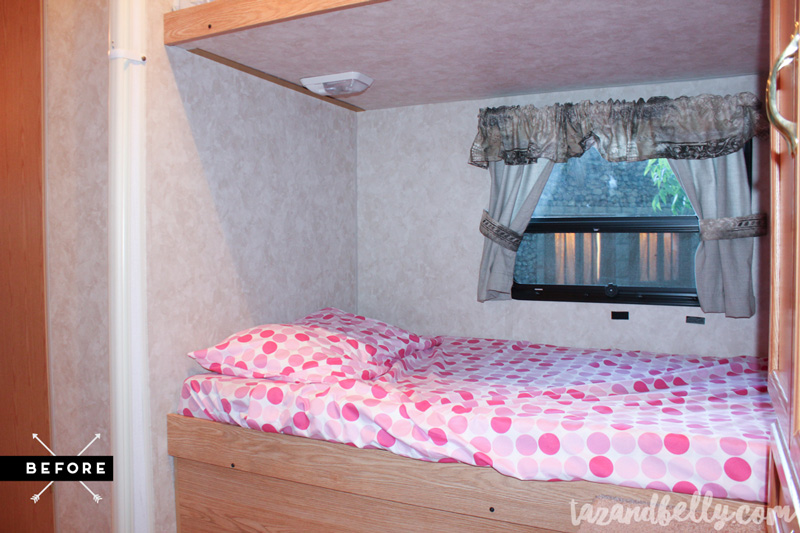
Here is a better shot at what the individual bunks looked like. You can see the faux finish of the walls, the horrible valances and curtains that came with the camper, and just how claustrophobic everything seemed.
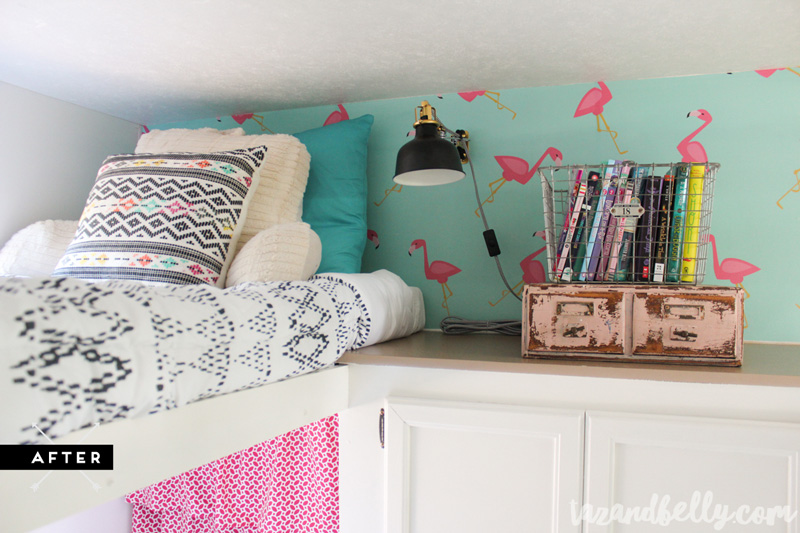
Now, isn’t that better?! Their room transformation started with these patterned comforters. I grabbed them at Bargain Hunt for less than $4 apiece. Yes, you read that right. In case you missed my earlier ode to Bargain Hunt, it’s a discount bin store (it’s a little dirty and you have to dig), full of Target’s cast offs and items from previous seasons. They discount items weekly and I try not to make purchases until the items I want are discounted 50% or more. Ella loved the black and white patterns, but we knew we wanted to punch it up a bit with brightly colored wallpaper and accessories.
wallpaper (c/o) | similar comforter | white sheet set | similar backrest pillow | similar tribal pillow | wall mounted lamp | wire locker basket | similar storage box
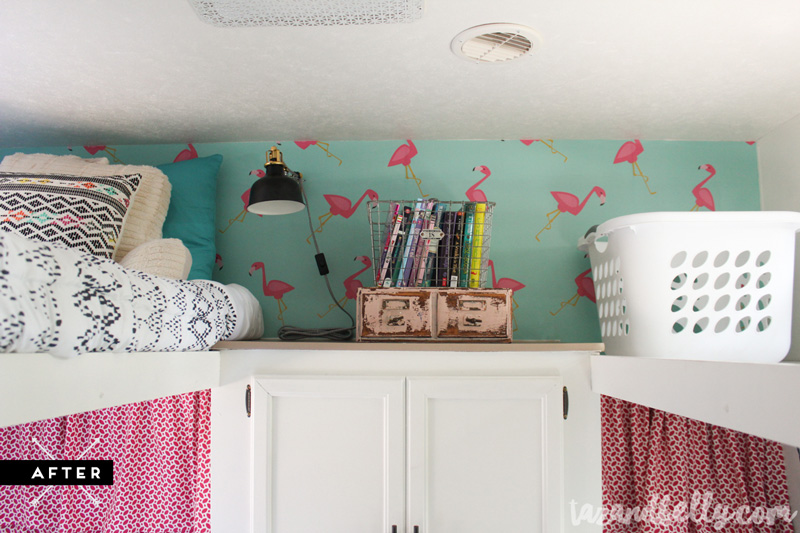
In our bunkroom, the beds on the left are considerably wider than the beds on the right. Neither are quite as wide as a standard twin mattress, but those on the left are definitely much closer. Now that the girls are a little older, we’ve moved Ella to the top bunk so that they can both have a bigger bed. We use the bunks on the right for other purposes and the one on the top holds our laundry baskets. We have two white baskets — one each for the girls to put clean folded laundry — and a turquoise basket to hold dirty laundry for everyone. It’s small and means I visit the laundromat a few times during our trip, but washing clothes in smaller increments takes up much less time. I know that many campers have laundry storage inside and we could probably make it work, but we’ve found using these baskets for the girls and Rubbermaid containers for the adults (we store them outside, just under the front of the camper), works best for us!
wallpaper (c/o) | similar comforter | white sheet set | similar backrest pillow | similar tribal pillow | wall mounted lamp | wire locker basket | similar storage box | white laundry basket
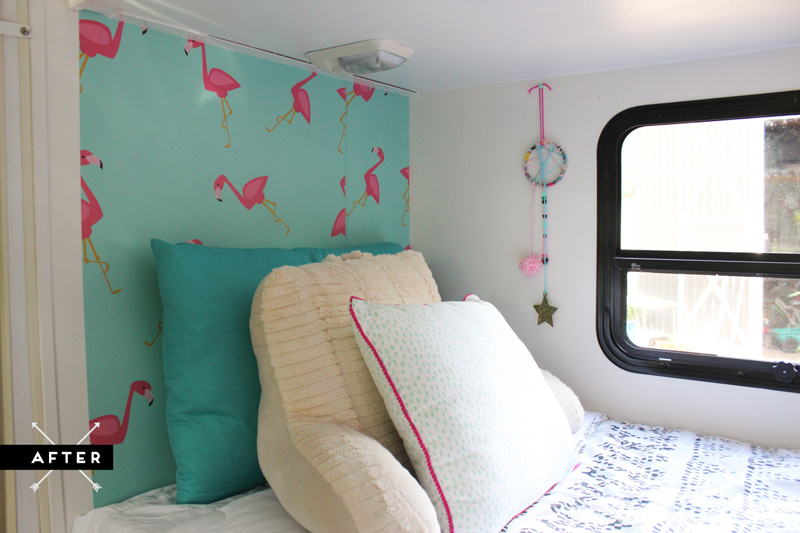
Sophie’s bunk took us a few times to get right. She can’t put her head at the other end like Ella, because there is an outside storage door there (FYI: she can’t open it from inside and you can’t open it from outside without a key). I tried wallpapering around the door and it just looked silly. Instead, we flipped her around to the other end of the bunk and used the leftover wallpaper to make her a pretty headboard. Yes, it’s pieced together and you shouldn’t have horizontal seams. Yes, I could have purchased one more sheet of wallpaper (or reached out to Walls Need Love for a replacement). Since I had such a hard time deciding which walls to paper on the bottom bunks and we tried several different options, I wanted to make sure we loved this before repapering or spending any additional dollars. Since you can only see this wall from inside her bunk, it honestly doesn’t make that big of a difference to anyone but me.
wallpaper (c/o) | similar comforter | white sheet set | similar backrest pillow | pom pom pillow| DIY dreamcatcher tutorial
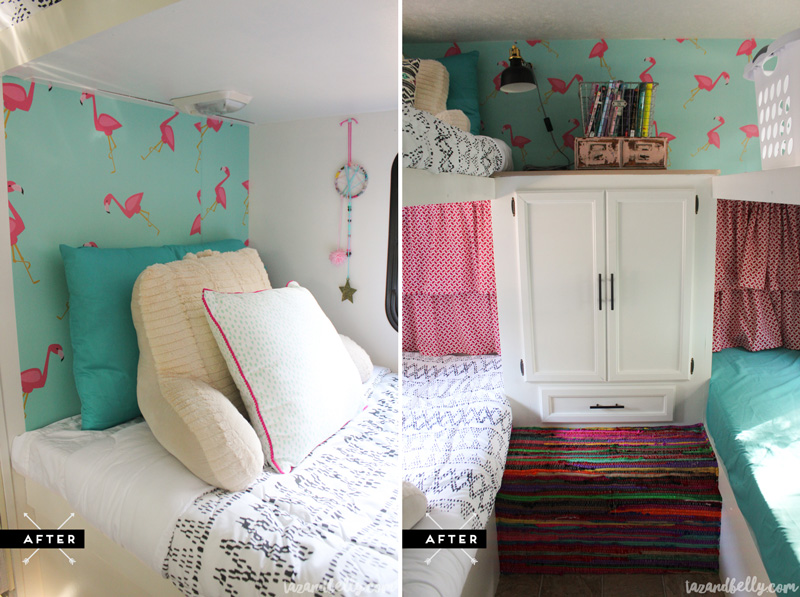
Since we couldn’t paper the wall with the storage door and I wanted to two sides to look identical, I made faux ruffle curtains instead. They cover up the door hardware on the left side and an extension cord for decorative lights on the right. I love the extra pattern and especially love the symmetry. I made four simple curtain panels for the bunk room last summer — two longs ones for the bottom bunk and two shorts ones for the top bunk. Here, I just used four tension rods to layer them on both sides. I love how they look tiered and I didn’t have to buy anything or do any extra sewing!
I knew that I wanted to cover the carpeted area below the girls’ cabinet, but I wasn’t sure how. Ultimately, I’d like to remove the carpet and replace it with a barn wood or shiplap cover like I did in the master bedroom. I was running low on time and hated the way the carpet looked, so I used an old rag rug to cover it for now. I cut it down to size, folded the edges under, and used a handheld staple gun to attach it to the carpeted plywood. The girls have sat and climbed on it for the last fourteen days and it is no worse for wear. Maybe we’ll keep it after all!
wallpaper (c/o) | similar comforter | white sheet set | similar backrest pillow | pom pom pillow | wall mounted lamp | wire locker basket | similar storage box | rag rug
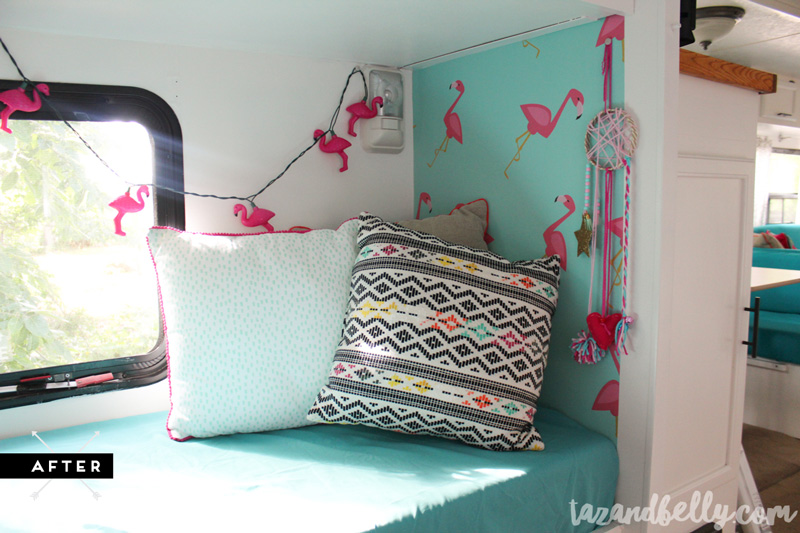
On the lower right bunk, we fashioned a couch for the girls to lounge or have additional seating space. I stacked the mattresses from both of the right hand bunks and covered them with a colored, fitted sheet. We added more wallpaper, loads of coordinating pillows and some fun string lights. Hudson spent the night with us earlier in the week and wanted to sleep on the couch, so it still works perfectly for tiny guests!
wallpaper (c/o) | fitted sheet | pom pom pillow| similar tribal pillow | flamingo string lights | DIY dreamcatcher tutorial
Thanks so much for visiting and reading today. I would love to hear what you think about our camper tour in the comments and it would mean so much to have you share today’s post — or any post in this series — on Facebook or Pinterest. We have had so much fun transforming our summer getaway and I want to share it with as many people as possible!
Final Camper Reveal | Master Bedroom Reveal | Kitchen Reveal | Living + Dining Reveal | Bathroom Reveal
