Disclosure: Affiliate links appear in this post. Any purchases made using these links will earn Taz + Belly a small commission. You can read more about our affiliate relationships here.
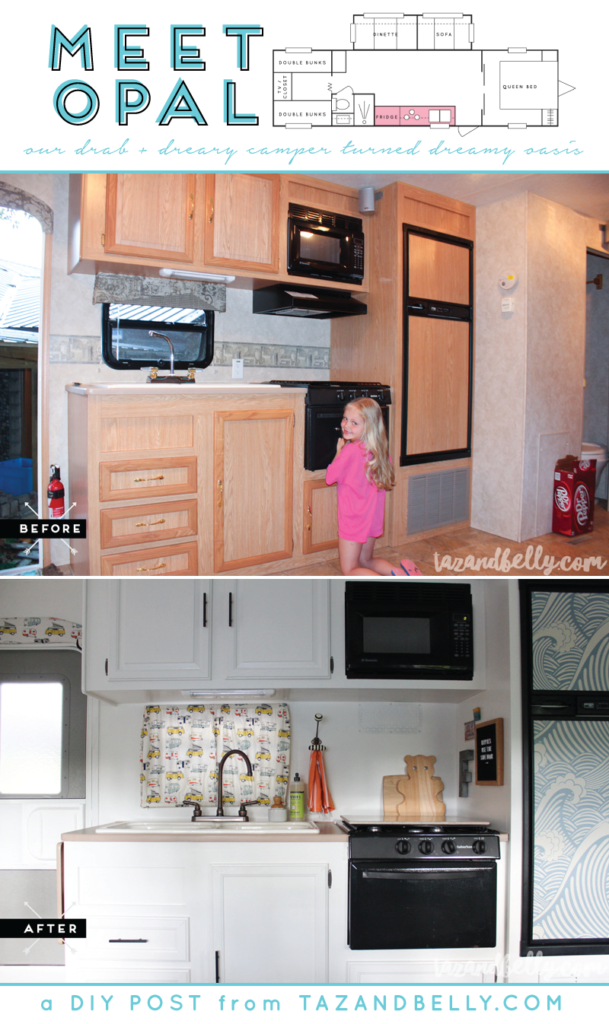
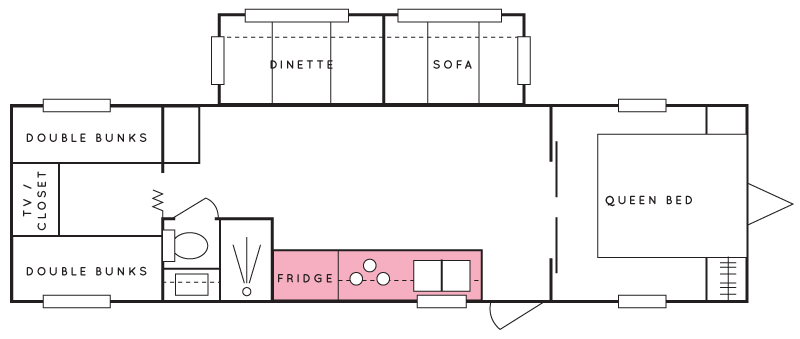
The next stop on our camper tour is the kitchen. Much like with the bedroom yesterday, I get a kick out of pretending this is a room of its own. It was finished long before the living and dining areas and I had it completely decorated while paint and sawdust were flying on the other side of the room. I couldn’t help myself — seeing each space finished was a huge motivation to keep it going. To help familiarize you with each space as we talk about it, I’ll include an image of our floor plan in each post. The kitchen is the pink space at the front of the camper. When you first walk in the door, it is directly to your left.
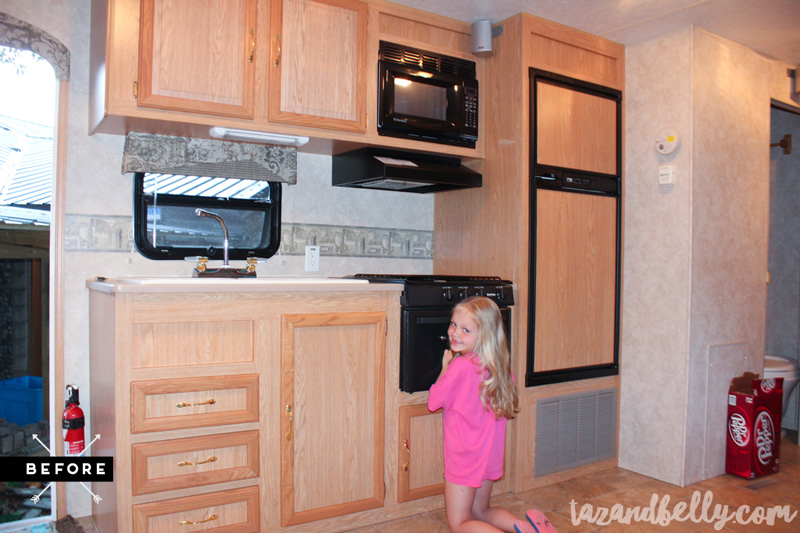
You know we have to start with the before photos, right? Can we first talk about the fact that you can see a sliver of the Rock House out the front door? Also, look how tiny Ella was! This was the summer before she turned six! Okay, back to the subject at hand. Another thing we loved about this camper is that the kitchen was confined to a single wall. In newer campers with this same floorplan, the counters are L-shaped and jut out into the room. One benefit to buying an older model in pristine condition, is that everything was much simpler. We preferred the wide open spaces of this model over anything newer that we looked at.
A few other things to note:
- Can you see the sticker on the vent hood? These appliances had never been used.
- Speaking of vent hoods, I removed this one to paint the cabinets and liked it so much that I never put it back. Be sure to notice how much bigger the kitchen seems without it. Since our cooking inside is limited, we can just crack that window if we need to use the stovetop. Otherwise, it’s electric skillet + crockpot city!
- Check out that glamorous wallpaper border! Ella actually peeled that off last summer and we were super glad to see it go.
This isn’t quite the same angle, but you can see all of the most important places! We recovered the fabric valance above the door (this is the only valance in the entire camper that we kept, but it covers up the screws that hold the door in place, so it had to have a facelift or be replaced). You can also see that the vent hood is no longer in place and that we added some decorative touches to the end panel of the cabinet. We were always losing our keys and this seemed the most logical place to hang them. The girls are OBSESSED with those doggie butt hooks and now our car and camper keys have a place to live.
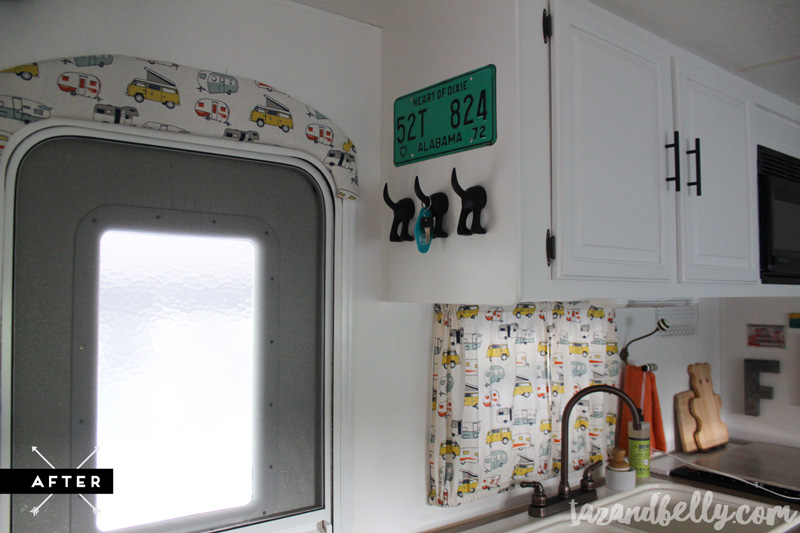
retro rv fabric | vintage license plate | vintage keychain | doggie butt wall hooks | cabinet hardware | faucet | mrs. meyer’s products | striped wall hook | turkish towels | zinc letter | assorted cutting boards
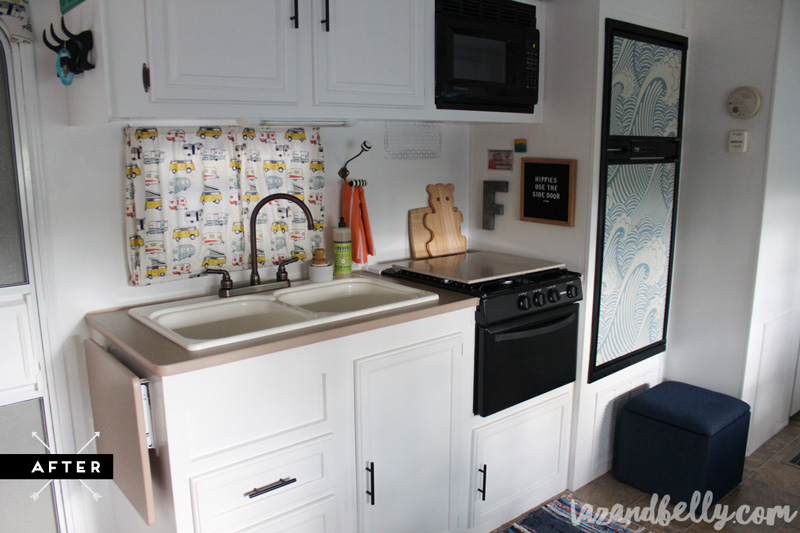
I knew that I wanted to create a little gallery wall here in the kitchen. The wall was just white and needed some color, so the letterboard and a few other small pieces were perfect! Most of the curtains in the main living space are easy to open and close, but I knew I wanted something stationary here. I really wanted to forgo the curtain altogether, but Josh said he wanted to be able to walk around in his underwear. Ha! We repurposed the hardware hiding underneath the old valances and my mom stitched a quick little curtain for me. The metal grate you see on the back wall covers up where the vent hose connected to the outside vent. I’ll go into more detail later in the week on how and why we covered them. My dad had an extra piece of solid surface countertop that fit the top of my stove perfectly and I grabbed that storage ottoman out of their attic and covered it with leftover chambray from a previous project.
retro rv fabric | vintage keychain | doggie butt wall hooks | cabinet hardware | faucet | mrs. meyer’s products | striped wall hook | turkish towels | zinc letter | assorted cutting boards | letterboard | similar storage ottoman | wallpaper
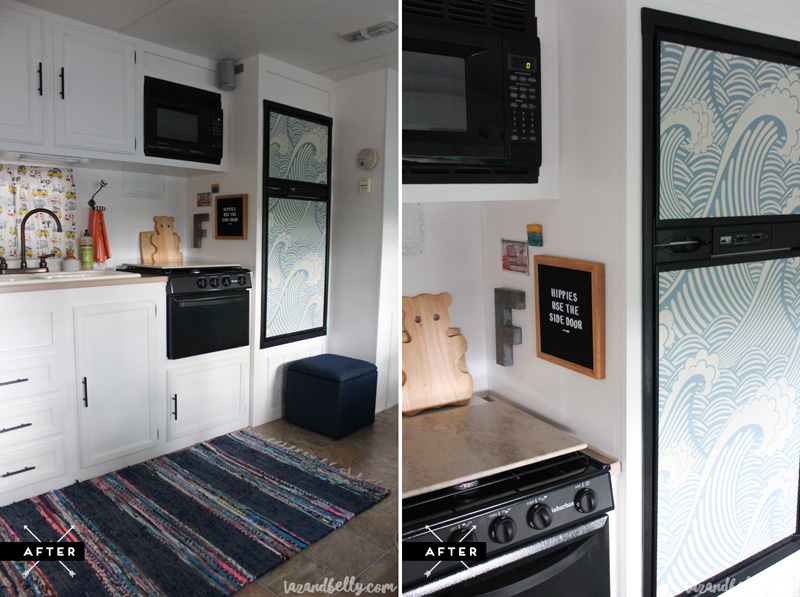
Two of my very favorite things live in this kitchen. The first is that vintage teddy bear cutting board. It was my grandmother’s (my dad’s mom, who died when I was in college) and I remember it living in her tiny apartment when we were little girls. It’s been stashed in my camper cabinet for years and, honestly, I thought it was dumb. I pulled it out when I was cleaning and styling the camper and I love it. It looks so adorable sitting on my counter and I’ve had so many questions about where it came from! Second, I could not decide what to do with the refrigerator. The panels were finished with the same wood as the cabinets, so it would have been pretty easy to paint. The backside of the panels were already painted with chalkboard paint (in an attempt to update her last year), but I wanted something with more punch. What I really wanted was to bring the wallpaper from our room into the main living space so that they related somehow. I didn’t have quite enough for this project, so I ordered one extra sheet and paid for it myself. Yes, $48 for a fridge makeover is probably dumb, but it totally makes the room!
retro rv fabric | vintage keychain | doggie butt wall hooks | cabinet hardware | faucet | mrs. meyer’s products | striped wall hook | turkish towels | zinc letter | assorted cutting boards | letterboard | similar storage ottoman | wallpaper | similar rag rug
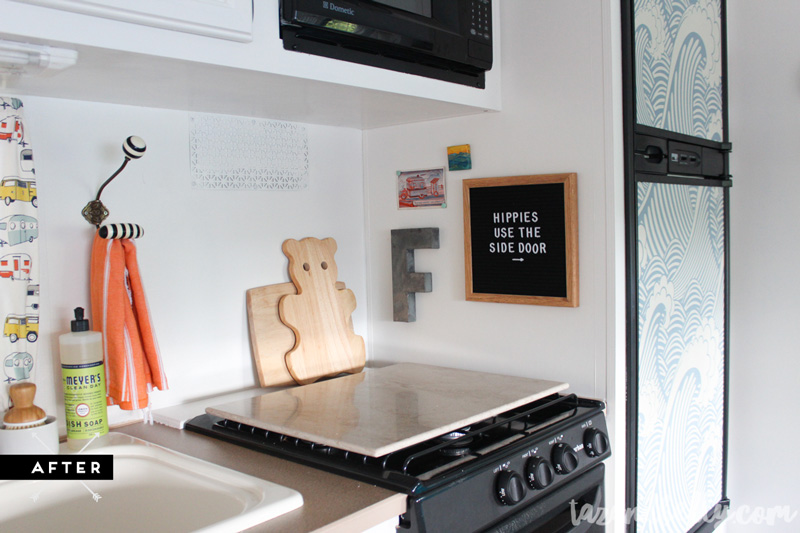
Sophie and Ella both can’t wait to change the quote on the letterboard. Sophie actually rearranged it earlier in the week to include her name and then a bunch of gibberish below it. Josh said Ella has been dying to change it ever since. I’ve been storing up beach quotes and Ella came up with a few cute ones, too, so we’ll be sure to share photos as we rotate through them this week.
See that tiny little painting above the letterboard? Ella bought that for me as a souvenir on her Virginia trip last month. It’s a tiny seascape and I love it with my whole heart!
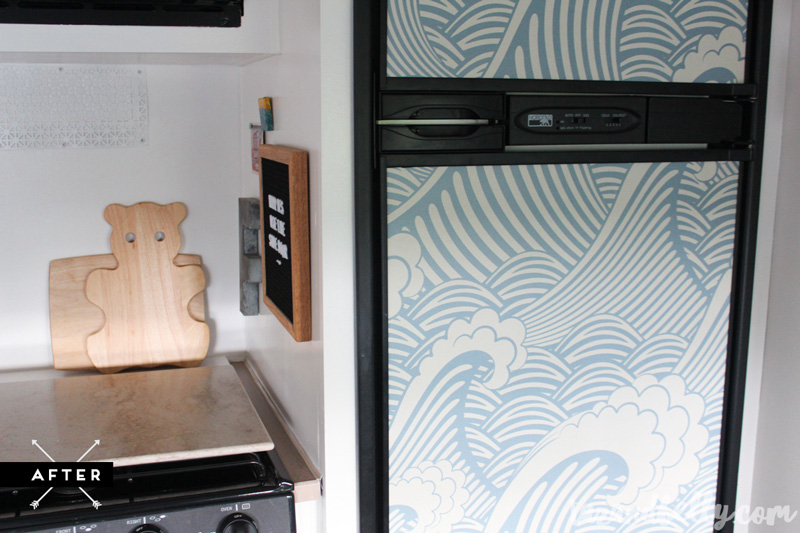
Is it just me or is that cutting board looking at us?
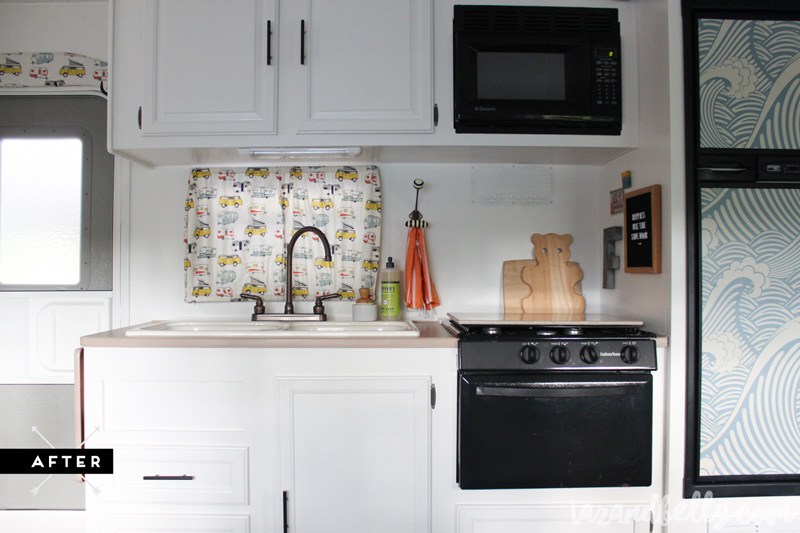
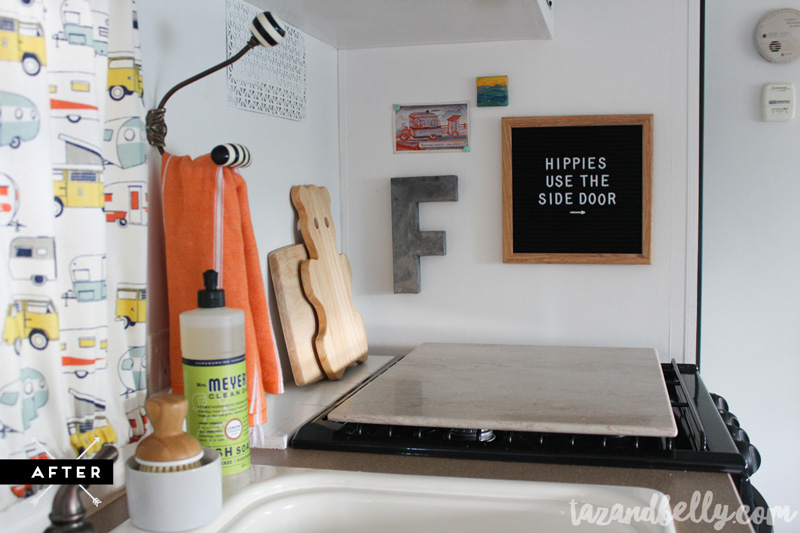
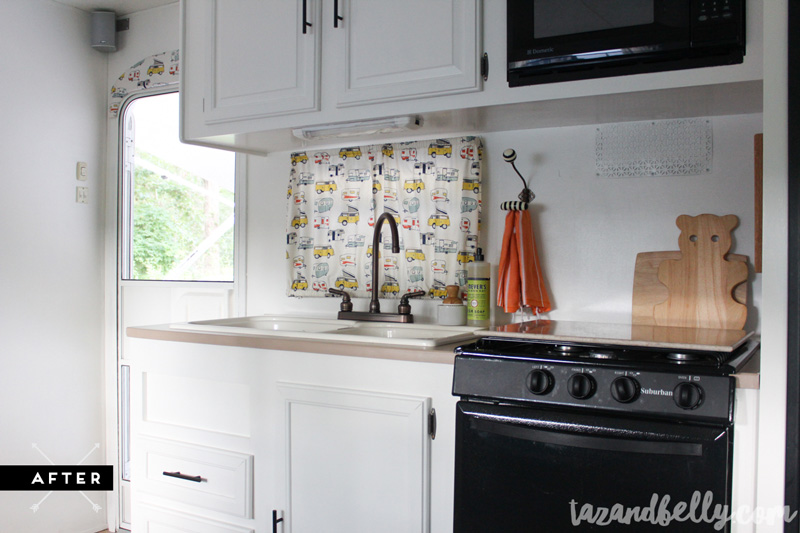
I love leaving the kitchen door open and just using the screen — it is so bright! Unfortunately, Josh likes to keep the camper as cold as possible, so I’m sure we’ll all be buttoned up this week. It was fun while it lasted!
Here you can see a better shot of the metal grate on the back wall of the kitchen. I toyed around with patching the wall or doing some sort of backsplash, but this project was supposed to be fun, easy, and manageable for me to do on my own. I painted the grate the same color as the wall and it really isn’t noticeable unless you just want to look at it. I might eventually hang a paper towel rack under the cabinet, but then again… I might not.
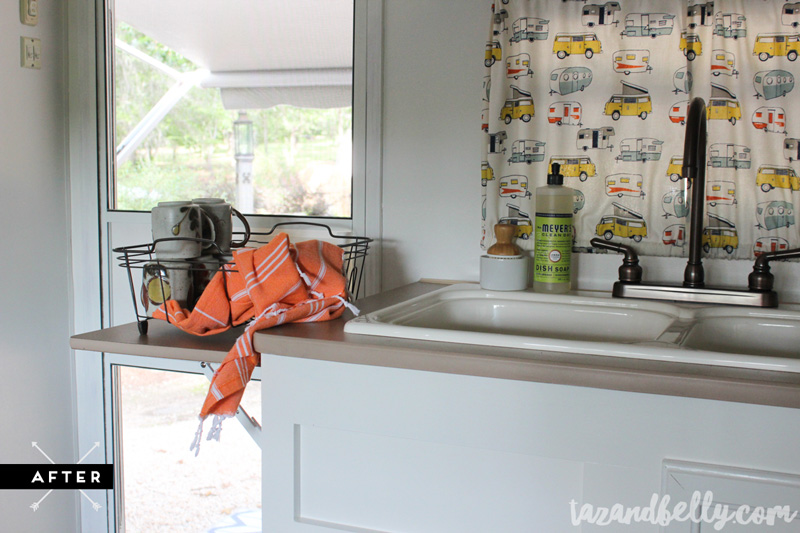
See that little shelf there on the end of the cabinet? That is a life saver. This is the shelf I mentioned in Friday’s bedroom post. It used to live in the corner of our bedroom for a television. It was either folded up or if I opened it to store books or clothes, I inevitably knocked myself out on it while getting into bed. Since it was the same finish as our kitchen counters, I relocated it here for extra prep space when cooking or washing dishes. Yes, it sticks out in front of the door, but there is plenty of room to walk around it if you need to and when it’s closed, it tucks perfectly out of the way!
Thanks so much for visiting and reading today. I would love to hear what you think about our camper tour in the comments and it would mean so much to have you share today’s post — or any post in this series — on Facebook or Pinterest. We have had so much fun transforming our summer getaway and I want to share it with as many people as possible!
Final Camper Reveal | Master Bedroom Reveal
